I've been into ombre shorts, cropped tops and fringed tops lately so I even decided to buy some on online shops. Well, I bought one fringed top 'coz it really caught my attention. Here's what it looks like.
Since I'm very into basketball, I guess this would fit me. But I'm not really a fan of Celtics (sorry to the fans out there). Anyway, as I've said I became really interested on the said clothes. I even decided to buy a few pairs of ombre shorts. But... I didn't. Instead, I decided making one. :)
 |
| The right one :) Sorry, this is the only decent photo I have with this top. |
Well, I decided to make two ombre shorts and a couple of shirts turned into tank tops. Since it was my first time to do this, I was kinda nervous for the result especially for the ombre shorts 'coz I really have no idea how it would turn out. But luckily, everything went well. I was happy with the outcome of my ombre shorts and tank tops :) I saved money plus I enjoyed making them :) I was glad that I have the time to do this. It's really a must try. It's actually easy and fast to make.
Let me share to you guys how I made them.
For the ombre shorts:
-denim shorts/pants
-boiling water
-bucket
-fabric dye
-bleach (optional)
-gloves
-scissors
1. If you'll be using pants, cut them according to your desired length. Distressing it would make it look better. To distress the shorts, just run the end of your shorts with the blunt end of your scissors.
2. If your jeans is too dark, bleach it first so that you will have a better ombre effect.
3. Then wash it with cold water to remove the extra bleach. Let it dry.
4. When the shorts is already dry: Place the fabric dye (choose your color), on the bucket and add the boiling water then place some iodized salt. Iodized salt is added so that the color would be intensified and for it to stick to the shorts well.
5. Dip the shorts for 5-10 minutes, depending on how dark you want the color to be. The longer it is, the darker it will become.
6. Wash it with cold running water.
7. Dry it.
P.S. Remember to follow the instructions written on the dye you used. On how long you should let it stay and when to wash it. Different dyes have different instructions for that :)
Let's go to the tops! This one's really easy to do :)
I did three different kinds of tops: the tank top, the fringed top and the hanging top.
What you will need:
-scissors
-pencil/marker (optional)
For the tank top:
1. Lay down the shirt.
2. Cut the collar part of the shirt, it can be deeper if you want to.
3. Cut the sleeves off. Depending on how low you want it.
4. Lastly, cut the bottom part of the shirt. Again, depending on how long you want the top to be.
P.S. You can always use a pencil to mark the shirt. If in case, you wanted it to be really aligned and all. But it's actually okay if you won't use one. That's what I did. Hihi.
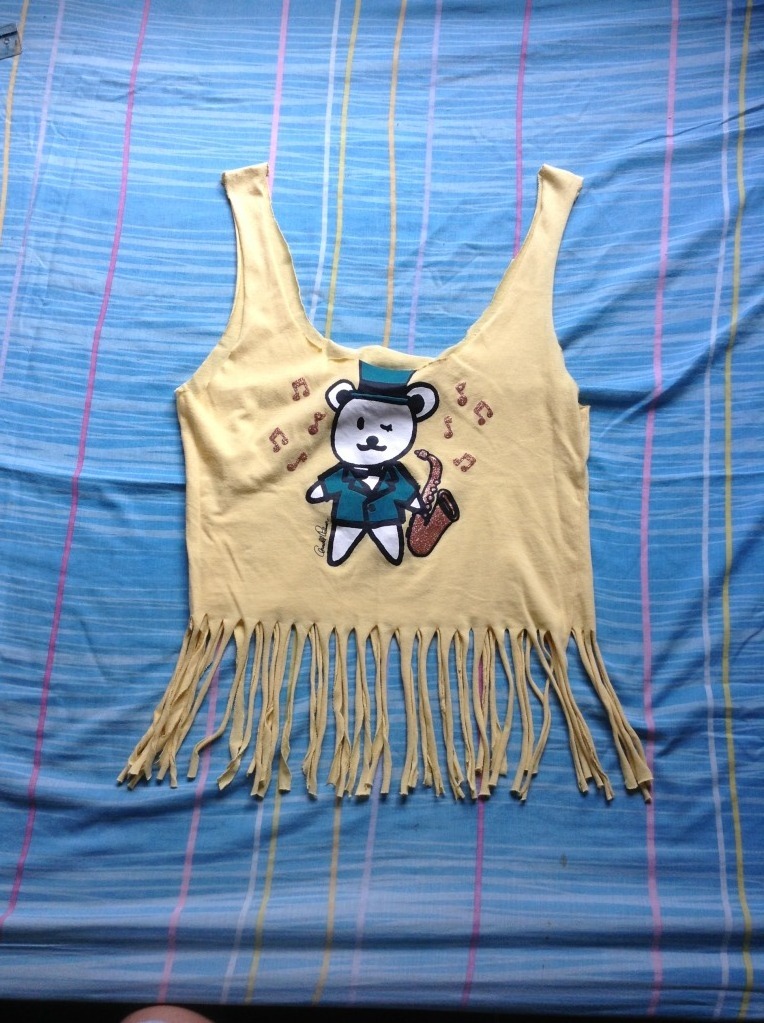
For the fringed top:
2. Cut the collar part of the shirt, it can be deeper if you want to.
3. Cut the sleeves off. Depending on how low you want it.
4. Place a tape 2-3 inches above the bottom part of the shirt. You can always go beyond or under the measurements I indicated.
5. Cut thin vertical strips from the bottom of the shirt until the tape.
6. Cut the hem line at the bottom part of the strips you made.
7. Press the strips from top to bottom to give it an edgier look. It will actually lengthen the strips and make it thinner.
For the hanging top: (this one's the easiest)
1. Lay down the shirt.
2. Cut the collar part of the shirt, it can be deeper if you want to.
3. You can cut a little part of the sleeves, I think that's better.
4. Cut the bottom part of the shirt. Cut it horizontally. The length of the hanging top would depend on you.
And there you go! I hope I was able to give proper steps. I'm not really good at these and I just wanna share what I did last week. To whoever's reading this, you should definitely try making one! :) I really did enjoy turning plain shorts into colorful ones and turning my big shirts into cool tank tops. :)
Here's the shorts and tops that I made :)
For the tops.
BEFORE:


AFTER:



BEFORE:


AFTER:


They would look much better when worn. -_- Sorry if I have no pictures of them when worn. But I'll probably wear some of these three weeks from now, when I go to Bora =)) I'll post pictures of these clothes after my Bora trip :) Hope you enjoyed reading this blog post. :)


